The guys from Speed Academy take a swing at a 2020 Toyota Supra A90 build that’s practical and performance enhancing.
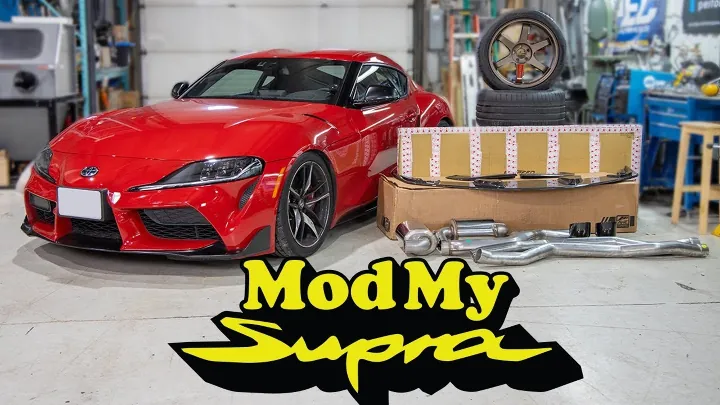
Vin, a friend of Speed Academy, loaned us his Supra, and we decided to surprise him with a few modifications that boost performance, improve sound and sharpen aesthetics. This is Part 1 of a two-part build series where we focus on a cat-back exhaust, a cold air intake and carbon fiber aero upgrades.
We’re keeping things simple — no warranty-voiding modifications, just bolt-on performance and a more aggressive stance. You can watch the Supra Video (Part 1) on the Speed Academy YouTube page.
Speed Academy is a website and YouTube channel based on making things go fast and enjoying cars. Peter Tarach and Dave Pratte are the forces behind Speed Academy.
The TTAC Creators Series tells stories and amplifies creators from all corners of the car world, including culture, dealerships, collections, modified builds and more.
Tools and Materials Needed for the Mods
- Socket set and wrenches
- Car jacks and jack stands
- Exhaust removal tool
- Torque wrench
- 3M double-sided tape
- Plastic clips and fasteners
Installing the AWE Tuning Exhaust System on the Toyota Supra A90
A high-performance exhaust system is one of the easiest ways to enhance the Toyota Supra A90’s sound and power. We opted for the AWE Tuning Touring Exhaust System, a cat-back system designed for better flow and minimal drone.
Steps:
- Lift the Car and Inspect the Stock Exhaust – The Toyota Supra A90 comes with a well-engineered factory exhaust, but it has restrictive areas that reduce flow.
- Remove the Stock System – The factory exhaust is one long piece weighing about 60 pounds. Despite the car being rust-free, getting it off took some effort.
- Install the AWE Exhaust – The AWE Tuning system features 304 stainless steel construction, a patented drone-canceling technology, and five-inch black diamond tips.
- Adjust and Secure the System – Slip-fit connections allow for fine-tuning, but after a few heat cycles, the system may need tightening.
Results: The system looks fantastic with its aggressive exhaust tips, fits perfectly, and promises a deeper, more refined tone without excessive drone.
Upgrading to an Injen Cold Air Intake
A cold air intake is one of the easiest ways to free up horsepower and improve throttle response on the Toyota Supra A90. Finding an intake wasn’t easy due to stock shortages, but our rep at Turn 14 managed to secure an Injen Cold Air Intake for us.
Steps:
- Remove the Stock Intake – The factory system is restrictive and quiet.
- Install the Injen Intake – Featuring a four-inch pipe, the Injen intake improves flow and adds around 15 horsepower and 17 lb-ft of torque.
- Secure and Test – Ensuring a tight fit prevents leaks and maximizes performance.
Results: A modest power gain and improved induction sound, making the Toyota Supra A90 feel more responsive.
Adding Carbon Fiber Aero Upgrades
Aesthetics matter, and carbon fiber splitters and side skirts give the Toyota Supra A90 an aggressive look without permanent modifications. We installed a Rexpeed front splitter, side skirts, and rear spats—all high-quality pieces with a factory-like fit.
Steps:
- Prepare the Mounting Points – Removing factory fasteners ensures a clean install.
- Install the Front Splitter – The Rexpeed splitter bolts up to existing points with some additional 3M tape for extra security.
- Mount the Side Skirts – These install using the existing fastener locations.
- Attach the Rear Spats – The most challenging step, requiring partial bumper disassembly to secure fasteners properly.
Results: A flawless fit with no need for drilling or modification, adding a race-inspired look to the Toyota Supra A90.
Conclusion: The Toyota Supra A90 Build is Taking Shape
With a new exhaust, intake, and carbon fiber aero kit, this Toyota Supra A90 is already looking and sounding better. These modifications provide a noticeable difference in both aesthetics and performance without voiding warranties.
In Part 2, we’ll complete the build and reveal it to Vin. Stay tuned for the big moment and let us know in the comments what your favorite Toyota Supra A90 mods are!
This article was co-written using AI and was then edited and optimized by our editorial team.
FULL TRANSCRIPT
Quick and Easy Toyota Supra Build – Part 1 of 2
00:00:00 Speaker 2
Welcome to Mod My Supra, where we’re going to surprise our buddy Vin with a few mods on his A90.
00:00:11 Speaker 2
So I borrowed this 2020 Supra with the idea that we’re going to use it in a track test, which we are going to do, and I’ll give you a little bit more information on that later. But we thought, while we have the car here for a few days, why don’t we surprise Vin with a few tasteful, and I think very tasty mods, you’ll agree. And that’s not just because he loaned us the car for a few days, but it’s actually because he’s been a longtime friend of ours. He was our crew chief at Targa Newfoundland. And back in the day, when Pete and I were still at Modified Magazine, he had a very early Scion FR -S that he let us take to the track, test a bunch of parts on, create a bunch of content for the magazine with. And we even created some content for it when we started Speed Academy. Our very first, I think, tire test was in his FR -S at TMP. So to say thanks to Vin for all of that support, we’re just going to, you know, tune him up a little bit here, make the car a little bit faster, sound a little
00:00:58 Speaker 2
bit better, and I think look quite a bit cooler. So with that said, where are we gonna start off here PT? Are we gonna maybe start with the exhaust system? I think so. It doesn’t need a buff. It’s already been ceramic coated, right? That’s true. We should mention that our buddy Cavalot make it shine has done a full polish of the paint He’s a clear brought it or PPF to the front hood the hood in the bumper I believe and the rest of it’s all been ceramic coated so here we are underneath the a90 and it’s interesting looking at the Exhaust system and all the flat bottom panels and all the you know, the heat reflective materials are used under here This is a well -engineered car. You can tell it was built as a proper sports car and looking at the exhaust system We are replacing it from the cat -back. So we’re not removing the catalytic converter or changing out the downpipe We know that’s a you know, a proven way to make a lot of power on this car, but this car is brand new It’s still under
00:01:46 Speaker 2
warranty. We don’t want to go avoiding Vins warranty without his knowledge So that’s something he can do he can worry about downpipes and tunes. We just want to add some sound and a few horsepower of a fighter
00:02:35 Speaker 2
there Pete
00:02:39 Speaker 2
the cat here was a devil to get off and imagine if it was actually rusty I mean this car has never seen winter driving it’s totally rust free under here and yet it was still tough to get off there so if you winter drive your super everyone and you want to change your exhaust system out we wish you good luck you may come down to a torch or something to get that part off but it’s crazy that’s just one piece yeah it is one piece which is made it a bit of a handful it weighs 60 pounds or around 27 kilograms this section does And you can see it’s pretty interesting. It’s got like this ovalized area here I guess for ground clearance purposes and then this really unique looking resonator goes into 70 mil tubing here and then crushes down quite a bit So you’re gonna definitely lose a bit of flow here and then it goes back to 70 mil at the back into this huge canister muffler and Yeah at 60 pounds, I’m guessing we are gonna save a little bit of weight, but more importantly I think we’re gonna improve
00:03:32 Speaker 2
flow though because we won’t have all these crushed bend areas And here we go everyone. This is our AWE tuning system for the A90 Supra and it comes in a bunch of different flavors We’ve opted for their touring kit with a without resonators or non resonated system So as you can see, it’s got these two rear muffler sections, which includes their 180 technology Which is a patented technology by AWE that cancels drones. So this system actually comes with like a no drone guarantee It also comes with a one year guarantee on the finish on this black diamond coated finish on these five inch tips, which I think is a really nice look, although you can also get it in a chrome finish if you prefer. And the rest of the system, which is all made of 304 stainless, comes with a lifetime warranty. So these guys really backed their product up. It’s all designed, engineered, and manufactured in -house at AW Tuning’s facility in the Philadelphia area. Right next door to our friends at Turn 14, where we’ve
00:04:24 Speaker 2
actually met them a few times. Super cool guys. So it’s really exciting to be able to actually put their product to use here. And, uh, one last thing I should mention is, uh, man, look at how cool this, this inlet section is all stamped out like this. Like it is a really beautiful piece of work. So let’s get down to bolting it up.
00:05:48 Speaker 2
Avidart Touring Exhaust System is bolted in place. Man, the slip fits do take a bit of patience to get them aligned, to get them, you know, fully engaged. So you do have to expect to spend some time like getting it fully dialed in, but it does let you get a very, very good fit because of all that adjustability. And if it’s like other slip fit exhausts that I’ve used before, you will have to go back maybe three days to a week later and tighten things up again, maybe give it a bit of an adjustment because as it heat cycles a few times, it might move. So we will, or maybe I will have the honor of driving this for a few days and test that out. But you’ll also notice that I installed the sport exhaust actuator here onto that billet AWE piece, which is to prevent a CEL or a check engine light from being thrown with that system. and it now lives up under here in a nice safe place. It’s like an emulator, I think, isn’t it Pete? So that should take care, they guarantee in fact that you’ll never
00:06:40 Speaker 2
get a check engine light with this system. And as you move forward, you see it just fits really nicely. I mean, I love these five inch black diamond tips. I think they suit the style of the rear bumper really nicely. It’s a very subtle look. You can adjust how far they stick out if you want. We just went for a nice, clean, simple look and it all falls in the right place. So really happy with the fitment of it. And I’m really excited to hear it fire up, But you guys are going to have to wait until near the end of this episode to hear it because We’ve got some other wrenching to do first for some under hood performance. We are going to be installing an air intake We thought long and hard about doing charge pipes and all this stuff But again, we want to just be simple and we want to make sure that this doesn’t void any warranties So first of all, I got to give a big shout out to Jeff stone back our sales rep over at turn 14 you won’t believe how difficult it is to get an air intake for a 2020
00:07:31 Speaker 2
Supra right now. There was no stock on anything. Thankfully, Jeff came through, found me a Injen cold air intake. So thank you, Jeff, for coming through so we can install this on this car. And this intake features a four inch pipe and makes about 15 horsepower and 17 foot pounds of torque. So we’re gonna be up around what, like around 20 -ish horsepower with the exhaust system. And
00:08:34 Speaker 2
there you go, looking good in here. I’m excited to hear this engine intake. I know it’s gonna make some really awesome noises. We are moving on to some cosmetics here with this very nice carbon fiber front splitter from Rexpeed. This is a really high quality piece in that twill carbon, as you can see, and it’s got a gloss finish on it. You can also get it in a matte finish if you prefer. And they use that Glossierit clear coat. So a very high quality clear coat. And the beauty of this is there’s no drilling involved this actually bolts up to all the factory points underneath the bumper there So they supply all the hardware you need as well as some 3m tape So this should be a relatively easy bolt -on installation. We’re not gonna be harming Vins brand -new super in any way We’re just gonna be making it look a whole bunch cooler so we held the lip up just to see where all the fasteners needed to come out and you can see that we’ve pulled a Bunch of the OE fasteners out of places as well as
00:09:23 Speaker 2
some of the plastic clips and we’ve dropped the backside of this under tray down as well so that we can get our hand back up in here because we are going to swap some of these out for a nut and bolt configuration. There’s a plastic clip inside right now that has a screw that goes into it, but Rexspeed says those aren’t strong enough to handle those. I guess that’s going to generate enough downforce that it would just tear out. So we’re going to remove those little clips in there, use the nut and bolt, and that will secure it on there properly. Okay so here’s our hardware. You can see I’ve got a little button Allen head bolt with a washer on it. And I’ve got a nut up on the inside of the bumper cover here now. And I am going through the hole if I could see it. It is a fussy job. And with the two of us, we’ve got the front two in already. So we’ll just have to keep chasing this, but the struggle is real, but the fitment looks like it’s going to be really good. Like, as you can see, once this
00:10:16 Speaker 2
is up tight against the body here, it is going to fit very nicely. Man, that fit up exceptionally well. I will say that having a second set of hands for the install is really helpful because It’s nice to be able to have one guy here kind of like putting the bolt through maybe guiding it with the Allen key And then having another guy in the back coming through to get the nut on and you could do it by yourself But boy, it’s a lot easier with a second person, but man it fits incredibly well I would say of all the carbon style lip kits that we’ve installed and we’ve installed quite a few of them over the years This is the best fitting one. Yeah, we didn’t have to hog a hole out or anything Nothing it all just right in there. No, usually you get to one end and like the holes way off and it’s what do we do? We got to loosen things and shift things this just went on So I’m guessing they like 3d scan the underside of the car here to get it to fit like this because this is really really good Just
00:11:04 Speaker 2
get my fingerprints off it and man, that looks good Got a nice amount of poke there It just adds some aggression to the front end of this car, which I really like and a couple of things We should note. However, there’s some damage on the stock part of the front lip here and that was not done by Speed Academy, that was done by Vin when he was test loading this on his trailer the other day. So don’t blame us everybody, Vin knows who’s responsible for that. To install these RecSpeed side splitters what we’re going to need to do is remove a bunch of the factory fasteners and then RecSpeed does recommend using their fasteners. I had a look underneath, I don’t know how that would ever work because maybe if you came through the inside of the chassis to get at the plastic clips on this side you could probably get a nut there but I don’t think that’s possible so I’m just going to actually reuse the factory fasteners on this side because what they do supply is a bunch of 3M tape which will apply
00:12:03 Speaker 2
underneath and I think that should hold this on just fine. It’s not like the front diffuser where at speed I don’t think this is going to see any type of like real deflection. I’ve just applied the supplied 3M double -sided tape here and I put on the chassis instead of the splitter because I find it’ll be easier to fit up and now what I’m going to do is bolt this on loosely and then we can peel some of that backing to get this to stick. What I’m going to do now is just remove the backing as such and I’m going to lift up, there we go get it in place and then i can bolt this up for a final time to install the rear spat is much uh like the same as the other parts and that is back here what we’re going to do is remove a couple of oem plastic clips and then we just have to access the back side through the rear here to put the bolt and nut combo through. On this side, it’s very easy. I can access it with my finger. Over here, not so much. So we’ve taken the wheel off, and what I’m going to do
00:13:17 Speaker 2
is just reach through the fender liner, and then I can access this quite easily and get it through there. Quick note, I actually had to pop the bumper apart here so I could slide my finger in here and get this nut in. I thought I’d just have to remove this, but it turns out you do have to separate this a little bit. And then we can tighten this all down once this nut is on here just like that that rear spot is bolted on and man does it ever look good and i gotta say all these rex beat parts fit up exceptionally well so good really nice quality the clear coats really high quality the weaves are all nice and straight and nothing’s been pulled so all in all really impressed with these and the relative simplicity of installing them like we talked about off the top well we have run out of time today so that is a wrap on this episode but in the next one we will complete the build and do the big reveal for VIN so stay tuned for all that but man I don’t know about you guys I’m stoked to hear how
00:14:08 Speaker 2
it sounds and see how it looks
